


Fancy a touch of salon-style glamour without the hefty price tag? You’re in luck! I’m here to guide you through the art of highlighting your hair right in the comfort of your own home. It’s time to bid farewell to pricey salon visits and hello to fabulous, fresh colour whenever you fancy.
But highlighting at home is more than just a budget-friendly beauty hack. It’s a creative journey to add depth, texture, and a pop of personality to your tresses. Think of highlights as the perfect way to inject vibrancy, create the illusion of volume, and even sculpt your facial features in a subtle, yet striking way.
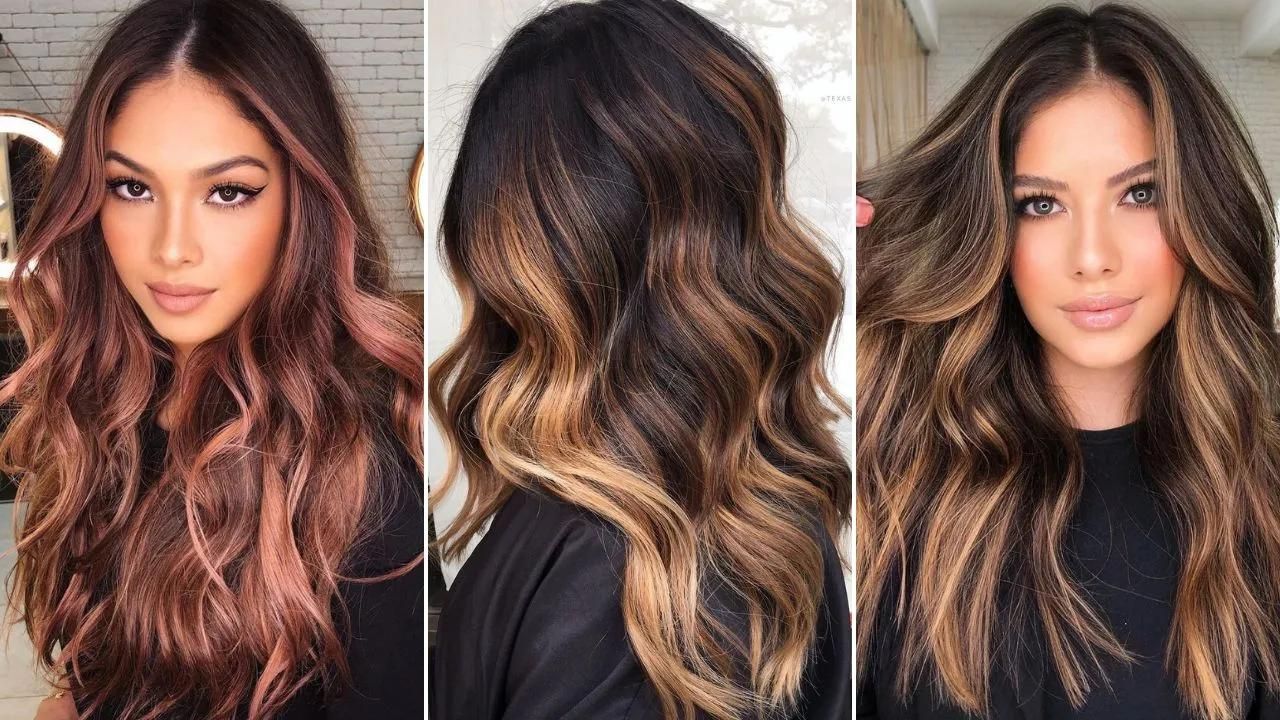
Whether you’re dreaming of sun-kissed balayage, chic foils, an edgy ombre, or face-framing highlights, the possibilities are endless. And the best part? You can choose from a palette of temporary, demi-permanent, semi-permanent, or permanent dyes, or even explore the world of hair toners to find your perfect match.
So, grab your dye kit and let’s dive into the world of DIY hair highlighting. Follow along as I unveil tips and tricks for a stunning, salon-worthy look right from your own home. Let’s turn those hair goals into a beautiful, vibrant reality!
Mastering DIY Hair Highlights: Key Insights Before You Begin
Embarking on the DIY hair highlighting journey? Let’s ensure your foray into home hair artistry is a smashing success! Here’s a little guidebook to navigate through the essential prep work before you unleash your inner hairstylist.
1. Selecting the Perfect Highlight Shade
- Color Compatibility: Your mission is to find a highlight hue that’s in harmony with your natural hair color. Aim for a shade one to two notches lighter than your base color. Tread carefully; a leap too light can lead to a stark, unnatural contrast.
- Skin Tone Synergy: The secret to standout highlights? They should complement not just your hair but also your skin tone. Assess your skin’s surface tone and undertone (be it warm, cool, or neutral) and let that guide your color choice. It’s about creating a seamless, flattering blend.
2. Popular Highlighting Techniques to Explore
- Foil Finesse: This classic technique involves painting sections of hair and cocooning them in foils. It’s a precision play that allows for meticulous color placement and even multi-hued marvels. Fun fact: Foil highlighting blossomed in popularity in the 1980s, though its roots trace back to the mid-1970s.
- Balayage Brilliance: Here, it’s all about freehand finesse. Sweep your chosen highlight hue across hair surfaces for a sun-kissed, gradient effect. It’s less about saturating and more about subtly enhancing.
- Color Melting Magic: The name says it all. This method blends multiple shades, melting them into your base color for an effortlessly smooth transition. The goal? To erase any harsh demarcation lines for a beautifully blended, multi-dimensional look.
Once you’ve nailed down your technique, you’re all set to transform your locks with a personalized touch. Remember, the key to great home highlights is not just in the technique, but in understanding your unique hair and skin characteristics. Let’s get ready to highlight your way to hair heaven!
DIY Hair Highlighting: A Step-by-Step Guide for Gorgeous Locks at Home
Venturing into the world of at-home hair highlighting? Whether you’re leaning towards sun-kissed blondes or rich brunettes, here’s your comprehensive guide to achieving salon-quality highlights from the comfort of your home. Let’s dive in!
1. Foil Highlights: Precision and Elegance
-
- Essentials: Highlighting kit, hairbrush, rubber gloves, sectioning clips, hair tinting brush, aluminum foil, rat tail comb, color-safe shampoo, and conditioner.
- Procedure:
-
- Prepare your dye following the kit’s instructions.
- Detangle your hair thoroughly.
- Part your hair and prepare foil strips.
- Section your hair into squares, using clips to hold them.
- Select a front section and slice off the surface strands.
- Place a foil strip under this section, apply dye, and fold the foil securely.
- Repeat for all sections, let the dye sit, then wash with color-safe products.
2. Frosted Highlights: Subtle and Refined
-
- Essentials: Highlighting kit with cap and hooks, rubber gloves, tinting brush, color-safe shampoo, and conditioner.
- Procedure:
-
- Mix the dye as instructed.
- Wear the highlighting cap and carefully pull hair through the holes using the hook.
- Apply dye to these sections evenly.
- Wait for the recommended time, then remove the cap and wash your hair.
3. Hair Chunking: Bold and Dramatic
-
- Essentials: Similar to foil highlights.
- Procedure:
-
- Mix the dye as per the box’s instructions.
- Follow the foil highlight steps but select larger hair sections for a bolder look.
- Process the dye, then wash and condition.
Remember, while ready-made kits are convenient, you can also highlight your hair using individual products. It’s all about finding the right technique and style that suits your personality and hair type. So, why not unleash your inner hair stylist and transform your locks with a touch of creativity and flair? Happy highlighting!
Highlighting Your Hair at Home Without a Kit: A DIY Guide
Fancy a change in hair color but don’t have a highlighting kit? No worries! Highlighting your hair at home without a kit is entirely possible and can save you a trip to the salon. Here’s your step-by-step guide to achieving those dreamy highlights with items you likely have at home.
Essentials for DIY Hair Highlights Without a Kit
- For Bleach Highlights:
-
- Gloves
- Bleach
- Aluminum foil, cut into small 8×10 inch pieces
- 10 vol. developer or 6% peroxide
- Mixing bowl
- Tinting brush
- Rat-tail comb
- Mirror
- An old T-shirt
Steps for Bleach Highlights
- Prep: Detangle your hair and wear an old T-shirt to avoid bleach stains.
- Mix: Combine the bleaching powder and developer as per the ratio instructions.
- Section Your Hair: Divide it into three parts, leaving the middle free and tying up the sides.
- Highlight: Use the rat-tail comb to slice thin hair sections. Place foil underneath, apply bleach, and cover with another foil piece. Repeat for the desired sections.
- Timing: Leave the bleach for the duration specified on the box, checking periodically for the desired shade.
- Wash: Once you’ve achieved the right shade, wash off the bleach with color-safe shampoo and condition.
Hand-Painted Highlights (Balayage) Without Foil
- Essentials:
-
- Highlighting kit
- Rubber gloves
- Flat paddle brush
- Hair tinting brush
- Sectioning clip
- Shampoo
- Conditioner
Steps for Balayage
- Mix & Prep: Follow the kit instructions to mix the dye. Wear gloves and section the top half of your hair.
- Apply: Coat the paddle brush with dye and run it through your hair from mid-lengths to ends, back and front. Saturate ends more heavily.
- Variation: Stagger the starting points of dye application for a natural blend.
- Repeat: Do the same for the top section.
- Time & Wash: Leave the dye for the set time, then wash with color-safe products.
Avoiding Zebra Stripes
The key to avoiding stark, stripe-like highlights is blending. When using the balayage technique, ensure you feather the dye at the start point and saturate more towards the ends. The idea is to create a gradient rather than a harsh line. Remember, practice makes perfect, so don’t be disheartened if your first attempt isn’t salon-quality. You’re learning a valuable skill!
Achieving Flawless Highlights at Home: Avoiding Zebra Stripes & Expecting the Right Colour
Highlighting your hair at home can be a rewarding experience, but the fear of ending up with zebra-like stripes is real. Here’s a guide to achieving evenly blended highlights and understanding the color changes you can expect.
Avoiding Zebra Stripes in DIY Highlights
- Precise Sectioning: The key to avoiding stripes is in how you section your hair. Smaller, thinner sections allow for more control and a seamless blend with your base color.
- Foil Technique: Using foils can be a game-changer. They not only keep the dyed hair isolated but also prevent color from bleeding onto other strands, ensuring even application and minimizing splotching.
Expected Color Changes After Highlighting
The results of highlighting can vary depending on your original hair color:
- Medium Brown Hair: Expect a lovely golden hue without bleaching.
- Dark Brown/Brunette: May lighten to chestnut or an orange tint due to the larger colour molecules.
- Red Hair: Could turn orange or even blonde.
- Dark Blonde: Often lightens up to a beautiful light blonde.
- Light Blonde: Might achieve a striking white-blonde effect.
Remember, these are general guidelines. The actual results can vary based on your hair’s condition and the products used.
Essential Tips for Home Hair Highlighting
- Choosing the Right Dye: Opt for a dye no more than two shades lighter than your base colour and within the same tonal family. Warm base? Go for warm highlights.
- Contrast Control: For more striking contrast, space your highlight streaks further apart.
- Frame Your Face: Place the lightest and thickest streaks around your face to enhance your features.
- Timing Before Events: If you’re highlighting for a special occasion, do it a couple of weeks in advance. This allows the color to settle and blend naturally.
Post-Highlighting Hair Care
Post-highlighting, it’s crucial to follow a dedicated hair care routine to maintain the health and color of your highlights. This includes using color-safe shampoos and conditioners, regular deep conditioning treatments, and minimizing heat styling to preserve the vibrancy and health of your hair.
By following these tips and understanding what to expect, you can confidently highlight your hair at home, achieving professional-looking results without the salon price tag. Remember, patience and practice are key to perfecting the art of DIY hair highlighting. Happy coloring!